Guides
Email account setup in Thunderbird
We will use a test email account support@nctest.info in this tutorial. For automatic email account set up you need to do the following:
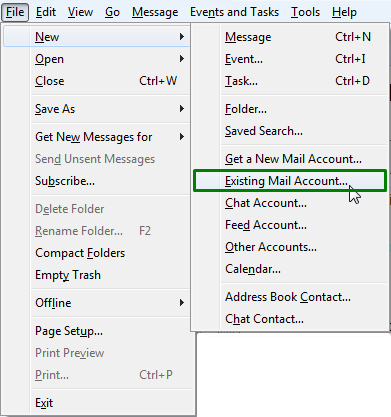
1. Go to File > New > Existing Mail Account:
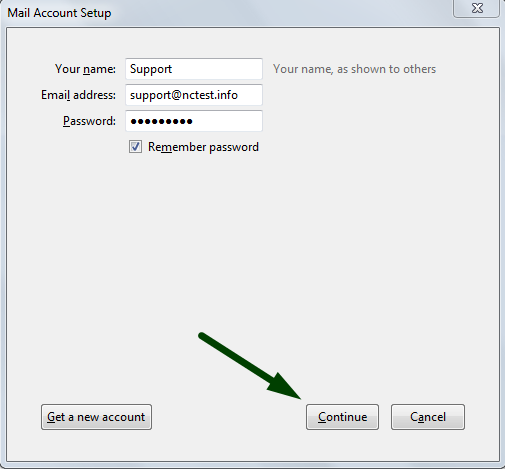
2. In Mail Account Setup window enter the following details:
Your Name: the name you would like the recipients of your emails to see
E-Mail Address: your full Private Email address
Password: password for your Private Email account.
Make sure you do not have blank spaces in it.
NOTE: if by any chance you do not remember your password, you can easily reset it using the following tutorial.
3. Once all the fields are filled, click Continue:
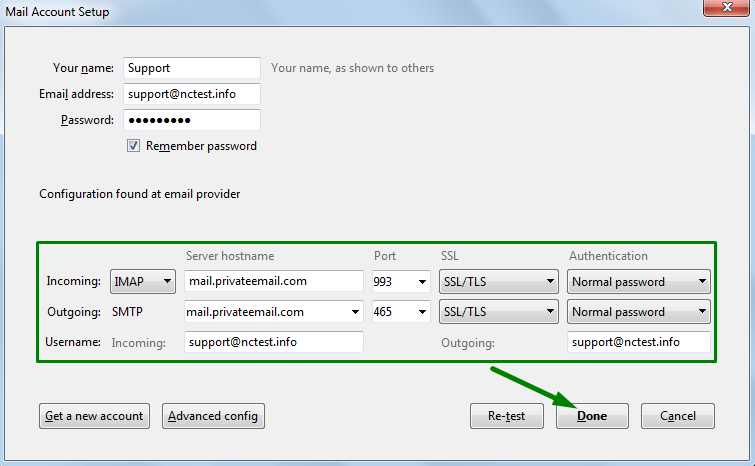
4. You will see Configuration found at email provider message.
Make sure that your Incoming and Outgoing configuration was detected properly and matches the one you can see on the screenshot below:
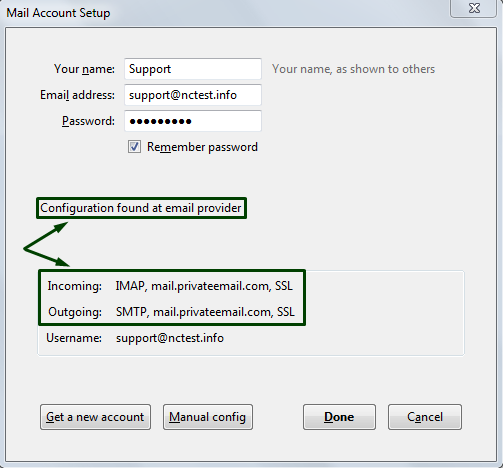
Click Done if it is the same.
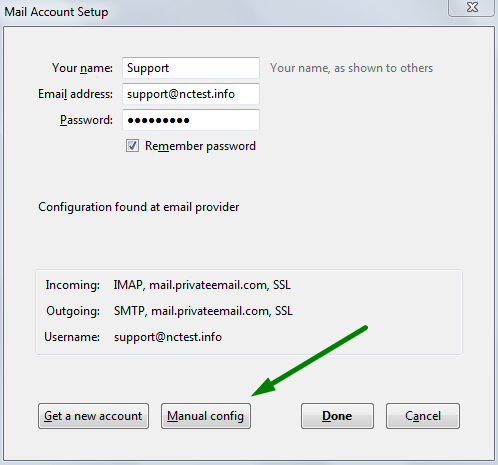
If you do not see Configuration found at email provider message or if configuration was not detected properly for some reason, you can complete the first two steps and continue configuring Thunderbird manually in this way:
1. After the first two steps are completed you will either see manual config window (in case Thunderbird fails to detect configuration automatically) or will need to click on Manual Config to see that window:
2. In the next screen, select POP3 or IMAP from the Account Type list, and enter your details as follows:
For IMAP protocol use the following settings:
Incoming and Outgoing server: mail.privateemail.com (it should not be changed)
Alternatively, smtp.privateemail.com can be used as the Outgoing server.
Protocol: IMAP Port: 993 SSL: SSL/TLS Authentication: Normal Password
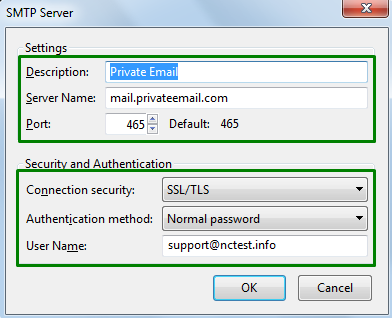
Protocol: SMTP Port: 465 SSL: SSL/TLS Authentication: Normal Password
For POP3 protocol use the following settings:
Incoming and Outgoing server: mail.privateemail.com (it should not be changed)
Protocol: POP3 Port: 995 SSL: SSL/TLS Authentication: Normal Password
Protocol: SMTP Port: 465 SSL: SSL/TLS Authentication: Normal Password

Alternatively, you can use following settings for IMAP protocol:
Protocol: IMAP Port: 143 SSL: None Authentication: Normal password
Protocol: SMTP Port: 587 SSL: None Authentication: Normal password
For POP3 protocol:
Protocol: POP3 Port: 995 SSL: SSL/TLS Authentication: Normal password
Protocol: SMTP Port: 587 SSL: None Authentication: Normal password
NOTE: if Add Security Exception window appears, click Confirm Security Exception button.
Advanced Settings
Once your account has been created, you will be able to choose additional settings for IMAP or POP3 incoming/outgoing server.
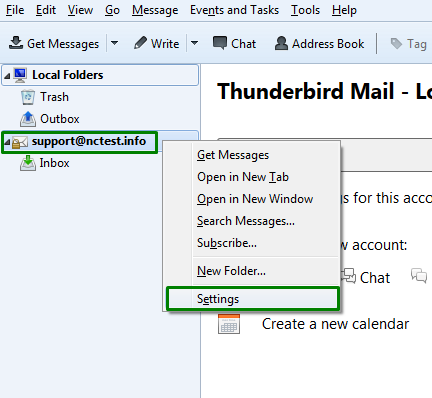
1. Right-Click on your account in the list of accounts:
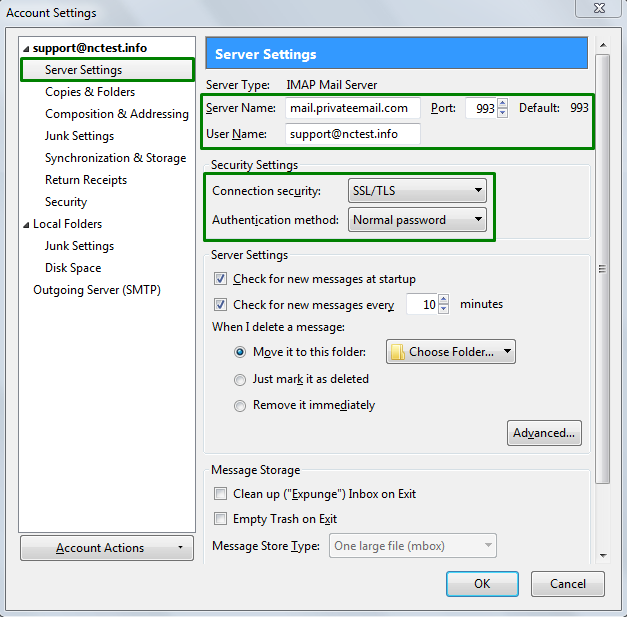
2. To manage incoming server, go to Server Settings:
3. If you need to change settings for outgoing server, select Outgoing Server (SMTP):
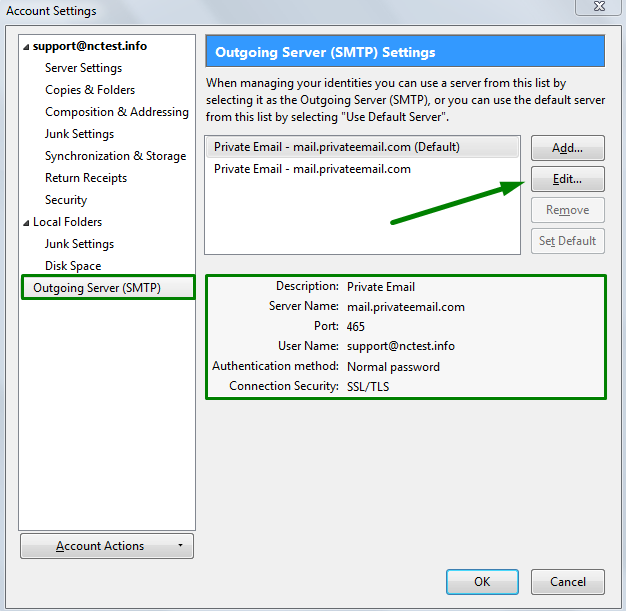
Here you can find your current settings for accounts you have and click on Edit… to make changes in the next window:
That’s it!
Website Design
Your website is your digital home—and we make sure it’s stunning, fast, and functional. From clean layouts to conversion-focused design, we build sites that deliver.

Graphic Design
Our creative designs are crafted to captivate, communicate, and connect. From powerful branding to sleek visuals, we create designs that leave a lasting impression.
Digital / Socials
Need to stand out online? We create clever campaigns that stop the scroll and get your audience talking.
SEO
Want to hit page one? We optimise your website with smart SEO strategies that get you noticed.

Huskii made the design process easy with their friendly approach, clear communication, and attention to detail. They met deadlines and went above and beyond to deliver a beautiful, user-friendly website. Highly recommended!

Heather Ford
Web Client